Create a New Time Entry Template
To create a new Time Entry Template, follow these steps:
Click Administration > Time > Time Entry Templates from the left side of the screen.
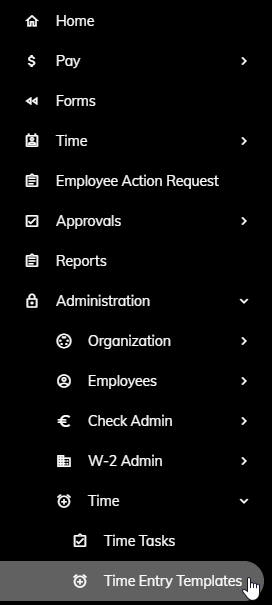
Click the New button.

Enter a name in the Template Name field.

Click Save Template.

Once the Template is saved, you will need to specify some additional information.
There are several fields on several tabs that need to be completed. The following is a list of each field and their function.
On the General tab, the following fields need to be completed:
- Current Pay Period - The pay period for which employees are currently entering time. This is the pay period that will appear in Time Entry for the employee.
- Current Approval Pay Period - The pay period currently being approved by the supervisors. This is the pay period that will appear in Time Approval.
- Group who can enter time for template members - You may assign a Group that has the ability to enter time on behalf of the employees assigned to this Time Entry Template.
- Period Numbers - The pay period numbers that are pertinent to this Time Entry Template. Mostly it will be periods "1;2;3"
- Period Type - How often this group is paid.
- Standard Pay Period Hours - The number of hours typically paid to an employee. This controls when an email is sent to the employee notifying them of missing hours. If 80 hours is specified in this field and an employee has entered 78 hours, this employee will receive an email notification for missing time. Note: This can be overriden at the employee level. Click here to learn how.
- Time Entry Days Based On Pay Period - You can set a default of how many days will appear in the employees time entry grid if their pay period type is bi-monthly or monthly.
- Time Entry Days - Number days that will appear in the time entry grid for this template if the pay period type is bi-monthly or monthly.
- Allowed Negative Hours - The number of hours an employee can go negative related to their leave time balances. If 5 hours is specified in this field and an employee with a balance of 2 vacation hours tries to enter 8 hours, the system will not allow the employee to enter the 8 hours as it would result in a negative balance that is greater than 5.
- Start Day of Week - The start of the work week for this Time Entry Template. This will be the first day that appears on the time entry grid.
- Send Email (No Time) - The number of days after the pay period end date when an email will be sent to those employees missing time.
- Time of Day (No Time) - The time of day when the email will be sent to those employees missing time. This time works in conjunction with the Send Email (No Time) field. If the pay period end date is 4/7/18 and we specified "2" days in the Send Email (No Time) field and "10:00 AM" in the Time of Day (No Time) field, this email will be sent on 4/9/18 at 10:00 AM.
- Auto Approve Time - The number of days after the pay period end date when time entry will be locked for an employee. At this point, the current pay period in time entry will move to the next pay period. In addition, supervisors will receive an email letting them know time is ready to be approved.
- Time of Day (Auto Approve Time) - The time of day when the pay period will be locked for time entry. This time works in conjunction with the Auto Approve Time field. If the pay period end date is 4/7/18 and we specified "2" days in the Auto Approve Time field and "12:00 PM" in the Time of Day (Auto Approve Time) field, the current pay period will move to the next pay period on 4/9/18 at 12:00 PM.
- Lock Approval - The number of days after the pay period end date when time can no longer be approved.
- Time of Day (Lock Approval) - The time of day when time can no longer be approved for the pay period. This time works in conjunction with the Lock Approval field. If the pay period end date is 4/7/18 and we specified "2" days in the Lock Approval field and "2:00 PM" in the Time of Day (Lock Time Entry) field, the current approval pay period will move to the next pay period on 4/9/18 at 2:00 PM. Any hours not approved from the previous pay period will no longer be available for approval.
- Show Time Clock Entry - Check the box if you want employees under this Time Entry Template to log when they start and stop during the day. When this option is selected, another section will appear at the top of the Time Entry screen for the employee to enter start and end times.
- Time Clock Interval - Specify the precision in minutes that is allowed for logging time. For example, enter "15" if employees need to log their time using only the quarter hour (e.i. 8:00, 8:15, 8:30, etc.).
- Send Change Notifications When Approver Changes Time - Check the box if you want the employee to receive notification when the approver changes their time.
- Show GL Activities - Check the box if the employees using this Time Entry Template record their time to GL Activities. If checked, this column will be available when entering time.
The Steps tab is used to setup who will approve time for any employees assigned to this Time Entry Template. More than one approval step can be utilized.
Follow these steps to complete the Steps tab.
a. Click on the Steps tab.
b. Click the Add a row button on the right.

c. Type a title for the Step Name.
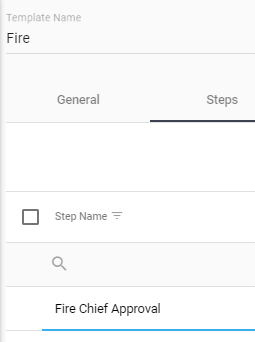
d. Select a Group from the drop-down
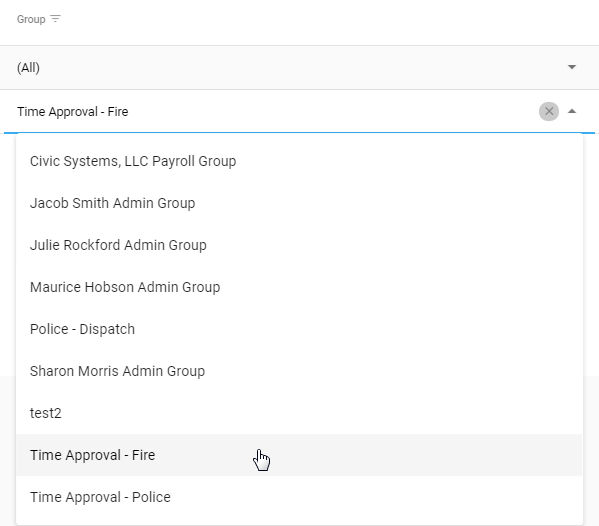
e. Repeat steps 6.b through 6.d to add another approval step.
Note: The approval steps go in order from top to bottom.
The Tasks tab is used to assign what Time Tasks employees can utilize when recording their time. Note: Only Time Tasks with a pay code that the employee has will appear for them in time entry. For example, if the vacation Task is assigned to this Template and an employee does not receive vacation, that Time Task will not appear for the employee to record time.
Follow these steps to assign the Time Tasks.
a. Click on the Tasks tab.
b. Check those Tasks in the Available Tasks section that should be assigned to this Time Entry Template.
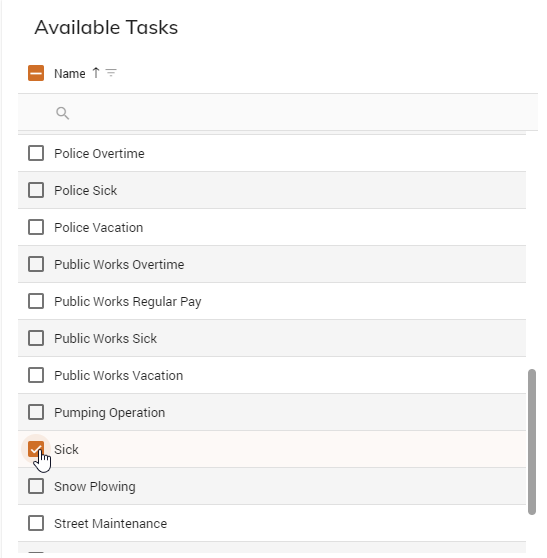
c. Click the Add Selected button. This will move the selected tasks to the Template Tasks section.

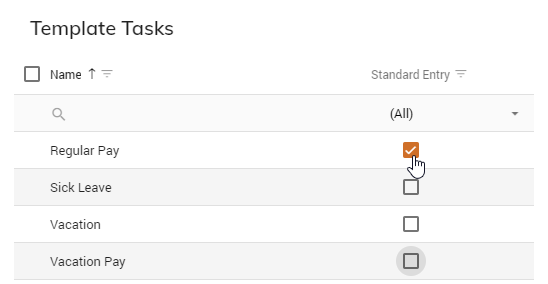
d. Under Template Tasks, click the Standard Entry check box next to those Tasks that you would like to automatically be setup as a Standard Entry for every employee assigned to this Time Entry Template. Click here to learn more about Standard Entries.
d. Repeat these steps as necessary.
The Caselle Activities tab is used to assign what GL Activities employees can utilize when recording their time. If GL Activities are not being used (see Show GL Activities check box on the General tab described above), skip this step.
a. Click on the Caselle Activities tab.
b. You have three (3) options to select from:
- All - Select this option so that the employees in this Time Entry Template have access to all Activities setup in the General Ledger.
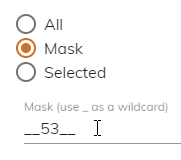
Mask - You can setup a mask so that the system automatically provides access to certain Activities. This requires the Activity Number utilized in the General Ledger to have some sort of consistency and methodology to its numbering structure. For example, our Activity Number is six (6) digits long. The first two (2) digits denote the year. The next two (2) digits denote the department number. The last two (2) digits are a counter. Let's say the public works' department is "53". The first Activity in the year 2020 would be numbered as 205301. The consistency for all public works' Activities is that the third and fourth digits are always "53". As a result we can mask the number by using two (2) underscores followed by "53" follwed by two (2) more undersocres.
Selected - Select this option so that you can choose specifically which Activities this Time Entry Template will have access to.
If you selected Selected, follow through with steps b and c below. Otherwise skip to d.
c. Check those Activities in the Available Activities section that should be assigned to this Time Entry Template.
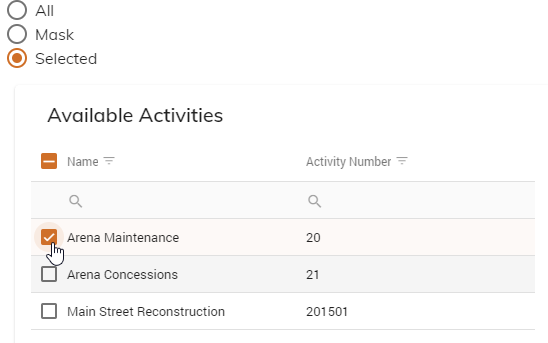
c. Click the Add Selected button. This will move the selected activities to the Template Activities section.

d. Repeat these steps as necessary.
Click the Save Template or Short Term Save button to save all your settings. The Short Term Save is utilized to reopen a pay period. It will prevent all automated activities from occuring as described in step 5 above. Once you have completed the necessary items, you will need to come back to this screen and change the pay periods and use the Save Template button.

To assign this Time Entry Template to an employee, click here.