Time Off Settings
You have the ability to turn on/off the Time Off features of the site along with customizing the email notifications when requests or the status of a requst changes. To modify any of the settings, follow these steps:
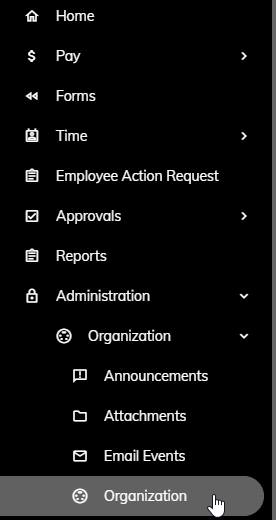
Click Administration > Organization > Organization from the left side of the screen.
Click on the Time Off tab.

Click on the Enable Time Off check box to provide employees with the ability to request Time Off through the miPay site.

Automated emails are sent to the approving supervisor when Time Off requests are submitted. You can modify the subject of the email. To do this, enter the subject text into the New Time Off Request Pending Email Subject field.

You can modify the message contents of the email in the New Time Off Request Pendng Email Message field.

You can utilize the toolbar to further customize your message by aligning the message, changing the font size, and more. Click here to learn more about customizing your message.
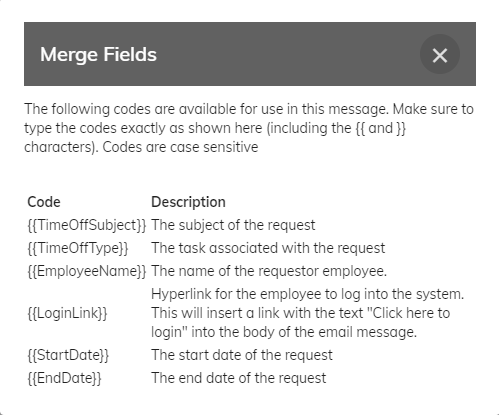
In addition, you can utilize six (6) merge fields that are available to embed into your email message. They are {{TimeOffSubject}}, {{TimeOffType}}, {{EmployeeName}}, {{LoginLink}}, {{StartDate}}, and {{EndDate}}. You can click the
 button next to New Time Off Request Email Message to learn more. See screen shot above utilizing the {{EmployeeName}}, {{TimeOffSubject}}, {{TimeOffType}}, {{StartDate}}, {{EndDate}}, and {{LoginLink}} merge fields in the body of the email.
Automated emails are sent to the requesting employee when Time Off is approved or rejected. You can modify the subject of the email. To do this, enter the subject text into the Time Off Request Status Changed Email Subject field.

You can modify the message contents of the email in the Time Off Request Status Email Message field.
You can utilize the toolbar to further customize your message by aligning the message, changing the font size, and more. Click here to learn more about customizing your message.
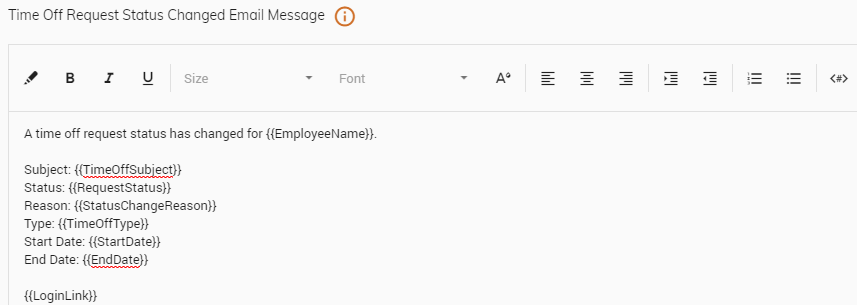
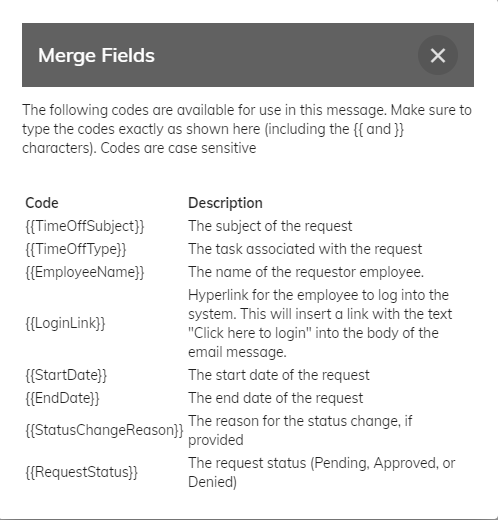
In addition, you can utilize eight (8) merge fields that are available to embed into your email message. They are {{EmployeeName}}, {{LoginLink}}, {{TimeOffSubject}}, {{TimeOffType}}, {{StartDate}}, {{EndDate}}, {{StatusChangeReason}}, and {{RequestStatus}}. You can click the
 button next to Time Off Request Status Changed Email Message to learn more. See screen shot above utilizing the {{EmployeeName}},{{TimeOffSubject}}, {{RequestStatus}}, {{StatusChangeReason}}, {{TimeOffType}}, {{StartDate}}, {{EndDate}}, and {{LoginLink}} merge fields in the body of the email.
Click the Save button in the upper right.
Note: You may need to scroll to the top of the screen to see the Save button in the upper right.
